I’m making a blog about projects that I’m working on!
Right now, I’m working on a couple projects targeted at improving my living environment, so let me start this blog by describing my bed, a project for which I’ve gone through a couple iterations. I live in the dorm East Campus (EC) where people often return their institute bedframes and instead build their own loft beds for their rooms. I like how lofts increase the floorspace of a room, but I didn’t like how they crowd the headspace. With that in mind, last year I started designing a bed that would lay on the ground for sleeping and fold up against the wall during the day. I also had an idea to motorize it for convenience. I was also working under the constraint of using only lumber, which I could reuse from EC rush activities.
I started imagining a full mattress frame on which the mattress would rest where the frame would be very thin but still strong enough so that the mattress would not fall through if I tilted the frame on a side. I started drawing plans with slats against a piece of plywood, but I didn’t like how much material such a frame added. It would make the bed about twice as heavy, and it increased the thickness of the bed about 2 inches from the starting 7 inches of mattress thickness.
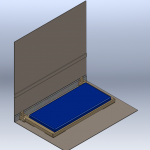
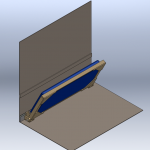
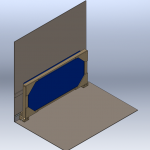
Instead, I realized the mattress had some strength itself, and I could support it without a full frame beneath it. I decided to instead frame the sides of the mattress in lumber and support the bottom with some kind of netting or else just a few strips of plywood. With that in mind, I made some plans:
For the frame, I used 4x4s on the short sides and 2x4s along the long sides. The lumber and mattress is shown in this drawing, but the netting underneath the mattress is omitted. I made this draft in SolidWorks.
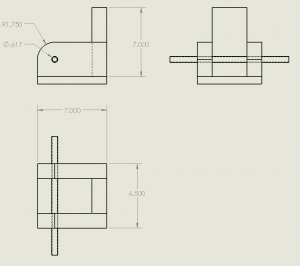
To fold up against the wall, I had the bed pivot on one side. I wanted hinges that could support on the order of 100 pounds, so I designed those pictured below. My intention was that, by cutting the beams at a curve, there would always be wood-wood contact between the frame and the hinge base. Then, the weight of the frame would be at least partially transferred through the wooden sides of the hinge bases rather than entirely on the copper tubing that I used as a pivot.
Before building the frame, I printed some dimensions off of my drawings to help me make check my measurements, like those of the hinge base above. When I built it, I assembled it in parts: the hinges, the short pieces with the corner boards, and I left the long pieces unconnected. This way, I could hypothetically disassemble my bed into easy to maneuver pieces if I wanted to change rooms.
After I put the frame together, the mattress could actually stay in place just from the support of the boards in the corners and from the grip of the frame itself. However, I went ahead and tied the mattress in to keep it from slipping out of the frame in case of extra load pushing the mattress up or down. I used paracord.
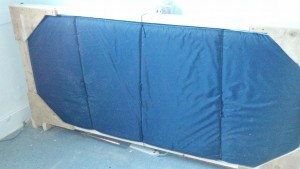
To support the mattress from underneath, I simply tied a length of cord between the long beams of the frame. The middle vertical black line in the above picture is this piece of cord. I also used a dremel to cut a shallow channel in the side of the beams for the cord to rest in, which you can see in the picture below of the cord wrapping around the topmost beam.
I also wanted cord pulling the mattress down into the frame to keep it from tipping out when I leaned the bed against the wall. However, I didn’t want the cord to get in the way, and I wanted it to be easy to unfasten the mattress to take off the sheets and wash them. First, I tied two lengths of cord around the uncovered mattress, which you can see as the left and right vertical lines in the earlier picture. I placed the bends for each length on the underside of the mattress for convenience. With the mattress on the ground, where the lengths of cord intersected the top edge of the mattress, I tied loops inline, 4 total. Then, I fastened each inline loop to more cord hitched to the frame such that the cord pulled the loops downward into the frame. I wanted small quicklinks, but I probably used slipknots as fasteners. Regardless, by unfastening these inline loops from the frame, I could easily remove the mattress from the frame. I could also remove the sheets, as explained below.
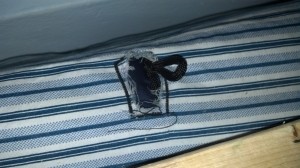
For covering the mattress, I first placed a foam mattress pad on top of the mattress. Then, I covered the mattress with a fitted sheet, and I cut 4 holes in the sheet for the inline loops to poke out. One loop is shown below. I stitched around all the holes to prevent the fabric from degrading.
Unfortunately, the frame was grunged over the summer, so I don’t have much media of the final product beyond some low-res video. However, I was satisfied with the action of the hinges, and the bed was light enough to lift with one hand. Here’s a shot of the full bed! I stitched it together from frames of video, so excuse the grey space.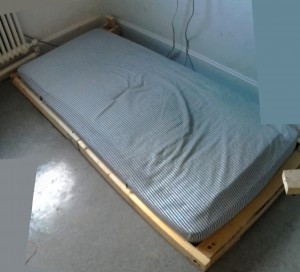
In a later post, I’ll tell you about my newer iterations of this project!
